General Information
To install this theme, you must have a working version of WordPress. Please refer to the WordPress documentation for further instructions. You can download the latest version of WordPress here.
System Requirement
Localhost (PC)
If you’re working on localhost (your PC), we recommend you to use XAMPP as the best Apache for WordPress CMS.
Hosting / Server
- WordPress 3.8 or higher
- PHP 5.3.29 or higher
- MySQL 5.0 or higher
- Apache mod_rewrite module must be enabled
This theme is tested under Mac, Windows, and Linux. Compatible Browsers: IE9+, Firefox, Safari, Chrome, Opera
Theme Installation
Import Dummy package (full website like demo)
* With the PRO version, you can download the Quickstart Package to get theme and sample data just like our demo site and access all the template features. This way, you just need to replace the demo content with your own to save development time.
After buying the PRO version, you can log in to the Customer Area and download the file ‘Dummy package (data like demo)’.
Before installing the Quickstart Package, make sure that you have installed WordPress. You can download the latest version of WordPress here. To better understand the Quickstart Package installation process, please see our detailed instructions on how to import Dummy package.
Install Theme Package
Install Free Template Package: This is the theme pack to use for a new website where you want to build content from scratch without sample data, or to use for your site with existing data. After downloading the .zip file, you can install it via Appearance.
- Log in to your WordPress admin page (usually it’s at: https://yourdomain.com/wp-admin/).
- Navigate to Appearance > Themes.
- Click the Add New button > Upload Theme > Choose File and browse for the file that looks like ‘[theme-name]-wordpress-theme-install-package.zip‘, then click Install Now.
You can see the following install illustration:
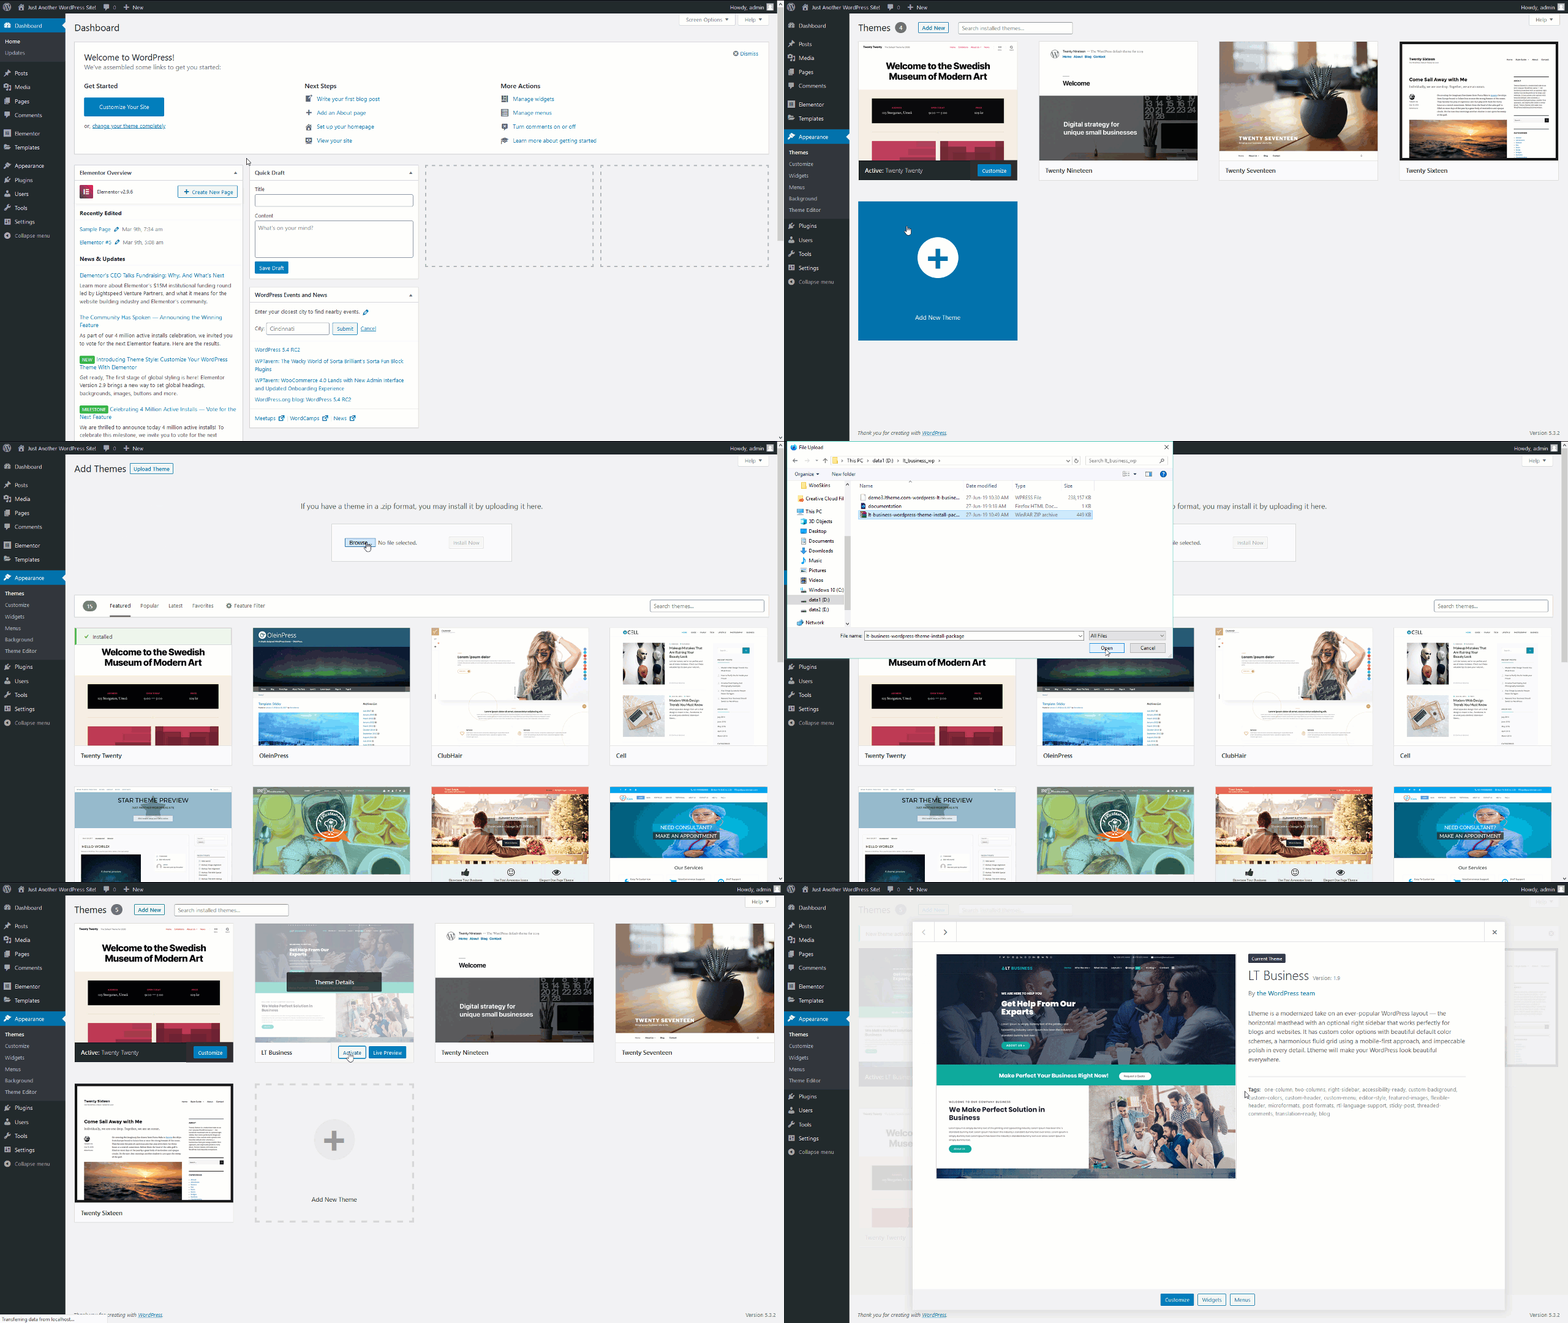
After completing the above steps, you can Active the theme to load the new theme style.
To build a shopping cart website, you just need to install the WooCommerce plugin, WooCommerce Compare, WooCommerce Quick View and WooCommerce Wishlist. and active it. Then, read the WooCommerce documentation to build your shopping cart features.

WordPress Block Editor
The WordPress block editor also called the block editor, WordPress editor or Gutenberg editor is the new way of publishing content in WordPress.
How to use the Site Editor
To edit the site’s styles
You can use the Site Editor to customize the styles for the entire website and for the blocks. Styles settings are available regardless of what template or template part you are editing.
- Go to Appearance > Editor.
- Click the Styles icon next to the block settings sidebar.
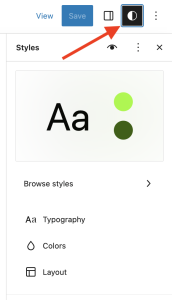
In the Styles section, you can browse the style variations available for the theme you have, change the color palettes and typography, and layout across the entire site and also change the appearance of blocks which are also applicable across the whole site.
To reset the changes you made, click the three-dot menu icon in the right corner and select Reset to defaults.
To customize the site’s layout
You can use the Site Editor to build the structure and layout of your entire site, using blocks. Eg: areas like headers, footers, and the structural appearance of your site’s posts and pages.
All blocks that are available in the WordPress Block Editor can be used in the Site Editor. A set of blocks called Theme blocks are specifically built for the Site Editor.
Examples: the Query Loop Block allows you to customize the look and feel of your post layout, the Navigation Block lets you customize the site’s navigation menu, the Site Title Block helps to customize the Site Title and more.
To browse the templates and template parts
From the Site editor, you can easily browse the templates and templates parts available for your site.
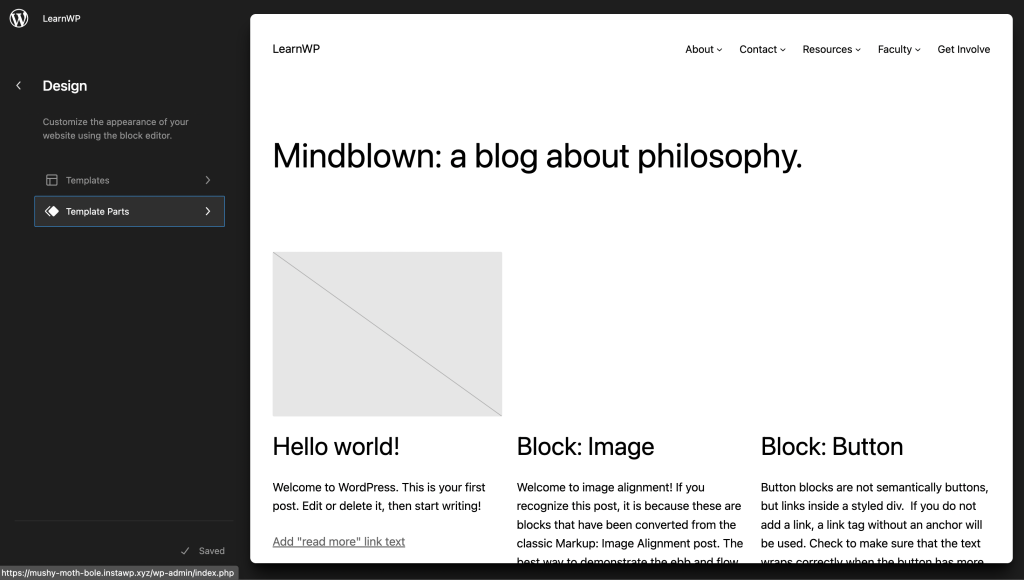
- Go to Appearance > Editor to open the Site editor. This will bring you to a view where you can choose to browse your templates or template parts.
- Click on Templates to preview the list of templates available for your site.
- Click on Template Parts to preview the list of template parts.
How to manage the site’s templates
WordPress uses templates to create the layout and structure for specific page types on your site. The Site Editor displays the template choices that you can add to your site and lets you create custom templates using the Template Editor.
From the Appearance > Editor, you will be shown a view that includes a sidebar with your list of templates and template parts. You can select any template you like from that list or click the “Manage all templates” to see them listed in a different view, where you can reset customizations, and rename or delete custom templates.
If you’re editing a template and want to return to that larger view, click the WordPress icon (or Site icon if you have set one) to open the Site Editor left navigation. This will open to the latest template you’re editing and you can use the < icon to go back to view the rest of your templates. If you go back to the list of templates, you can either preview all of your templates from there or click Mange all templates to see a list of templates available. Included in this list are those that came bundled with your block theme and the custom ones you created from the Template Editor.
How to manage the template parts
A Template part is a block for managing the repeating global areas of the site such as a Header, Footer, Sidebar, etc. They are primarily meant to define the site structure and can be reused. You can also create custom Template Parts that can be reused through the templates.
From the Appearance > Editor, click the Template Parts option to view the list of template parts created for your theme.
How to update your site icon
Block themes include the ability to use the Site Logo block which has built within it an option to set your Site Logo as your Site Icon. For context, the Site Logo simply displays whatever logo you set for your site whereas your Site Icon is also known as a favicon and it is used to help identify your website.
Follow the steps below to use the same image for the Site Logo and Site Icon:
- Head to Appearance > Editor. This will open up your homepage.
- Either find your Site Logo block added by your theme or add it to yourself wherever you’d like.
- From there, you’ll see the option to upload or select an image to use from your Media Library.
- After choosing an image and while still selecting the Site Logo block, open the block settings sidebar (uses the cog icon).
- Under the settings for the Site Logo block, toggle on the option to “Use as site icon”.
- Save your changes.
How to update what your homepage displays
Your homepage can show a list of your latest blog posts or a static page with custom content. Which setting you use depends on the templates that are included in your theme. To view the list of templates, go to the Administration Screen > Appearance > Editor > Templates.
- If your theme does not have a Home or Front page template, select the Add New button and create a new Front Page.
- If your theme has a Front Page template, click on the link with the template name to open the editor.
- If your theme has a Home template, you can edit the template or set what you want to appear in the Administration Screen > Settings > Reading.
How to customize your homepage
Latest Blog Posts
To customize your blog, go to Administration Screen > Appearance > Editor. The editor will open your homepage, and you can start editing.
Block themes display lists of blog posts with the Query Loop block and the Post Template block.
When you add a block inside the post template block, it is repeated for every post in the list. The Post Title and Post Featured Image, Post Author, Post Date, Post Category, and Post tags are examples of blocks that you can use to customize your blog.
Static page
If you have selected a static page for your home page, and you want it to have a different design than other pages, you need to assign it a different template.
Follow these steps to assign an existing template:
- From your wp-admin dashboard, head to Pages > All Pages.
- From the list of pages, select the option to edit the page you have set as your home page.
- Once in the editor, open the settings sidebar.
- Under “Template”, you can then select whatever Template you want your home page to use.
- When you’re done, select “Update” to save the changes.
Follow these steps to create a new template:
- From your wp-admin dashboard, head to Pages > All Pages.
- From the list of pages, select the option to edit page you have set as your home page.
- Once in the editor, open the settings sidebar.
- Under “Template”, select New.
- This will open the Site Editor to add blocks for creating your template for your static homepage.
- When you’re done, select “Update” to save the changes.
Please note that if you add a Front Page template in the Site Editor, it will always be used as the front page regardless of what setting you choose under Admin > Settings > Reading. You will need to either customize that template to your liking or remove it to then adjust the homepage settings again.
Post Management
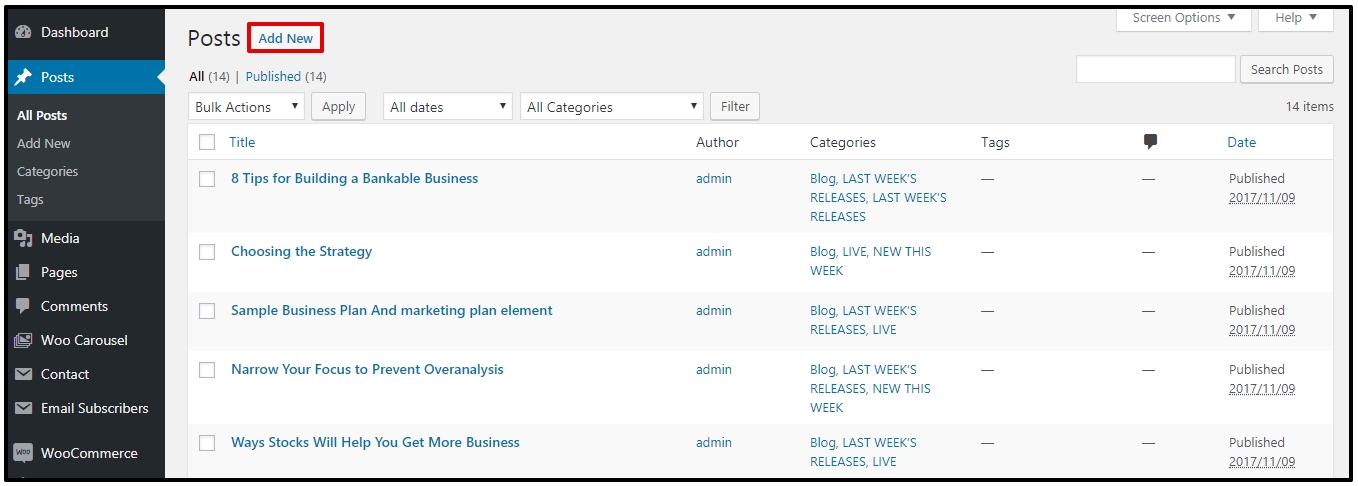
This is Posts in WordPress and you can use it to build a blog for your page.
– Go to Posts > Add New to add a new post. You can add various types of items to your post: Vid
eo, Audio, Gallery, Quote, etc.
Smart Slider 3
Smart Slider 3 is the most powerful and intuitive WordPress plugin to create sliders that were never possible before. Fully responsive, SEO optimized, and works with any WordPress theme. Create beautiful sliders and tell stories without any code. A beautiful interface makes creating slides fast and efficient. The complete freedom to build what you want, the way you want. Edit your slides as you used to in page builders. Drop layers after each other and structure them with rows and columns. Enhance your slider with the layers and make your site even more unique and grandiose. Every heading, text, image, button, and video can be edited easily with the customization options. Change all the details that really matter in typography and style.
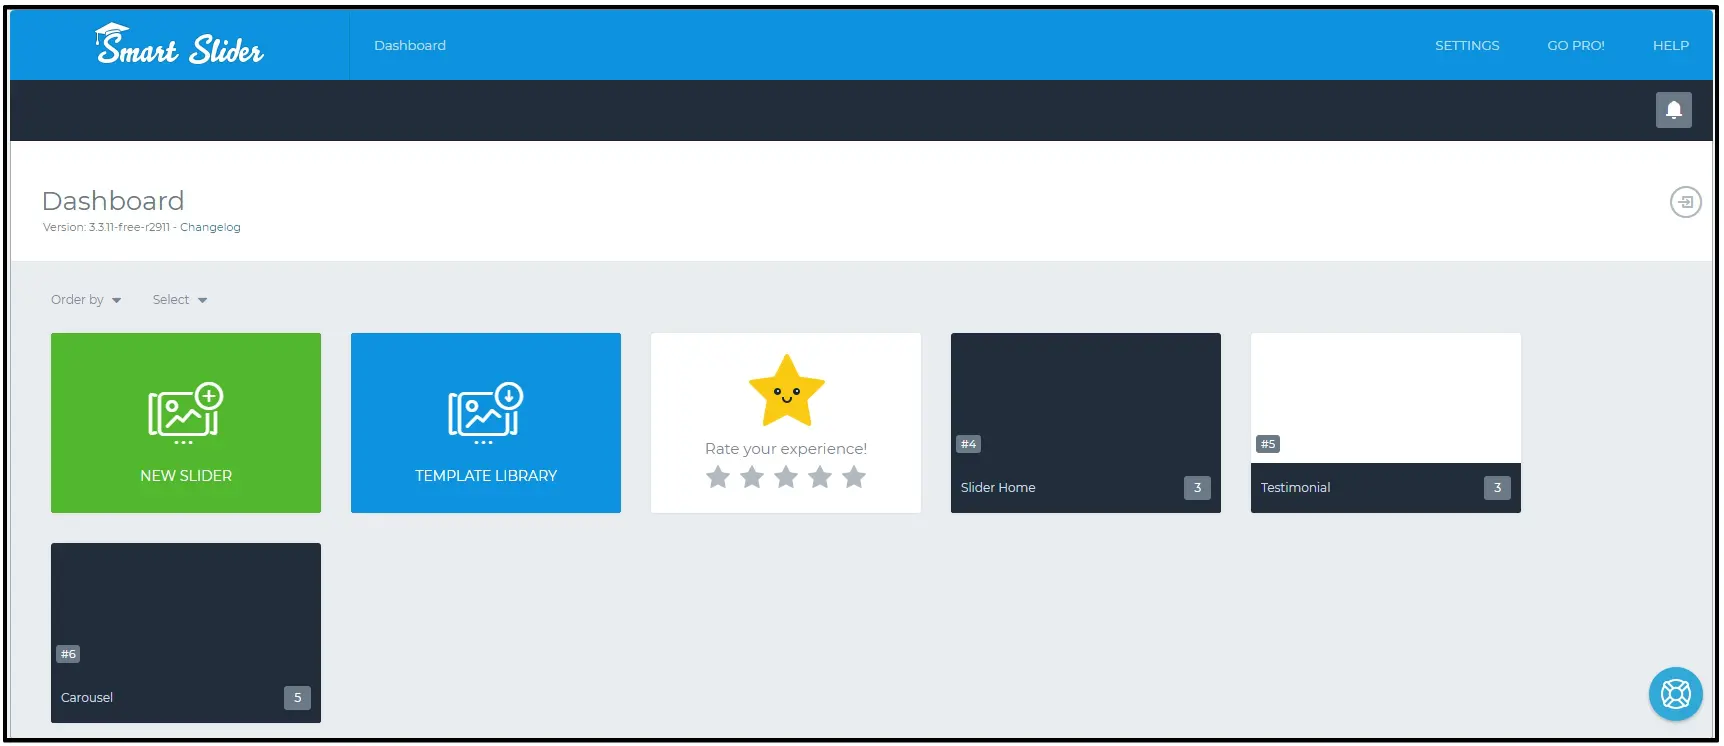
Learn more about how to use Smart Slider, you can visit portal document for this plugin.
Hosting Recommended
If you’re looking for good hosting for your website, recommend you with Ultahost web hosting provider. This hosting is fully compatible with our products. Extremely fast, secure and user-friendly website hosting for your successful online projects, get up to a 20x faster page load times, with unlimited bandwidth and a free cPanel license. Ultahost is recommended hosting from our team for all WordPress themes and Joomla! templates from our company.
Extensions Build-in
CSS Libraries
CMS Using
WordPress CMS
Support system
Forum & Ticket System
Dedicated Ticket Support System (PRO Customers only)
Install Service
If you want to install the Quickstart package on your hosting, you can order here.
Extra Services
Customization Task
If you want to hire our developer for the custom template, you can request it here.
Development Service
Looking for a new template for your project, and only use it for your website, ask our developer here.
